How To Build Your First Android AR App In One Hour
By the end of this article, you will learn how to create AR objects and even a Portal which brings you to anywhere in the world! I will be using AndroidStudio, ARCore and Virocore. You can find my full code here.
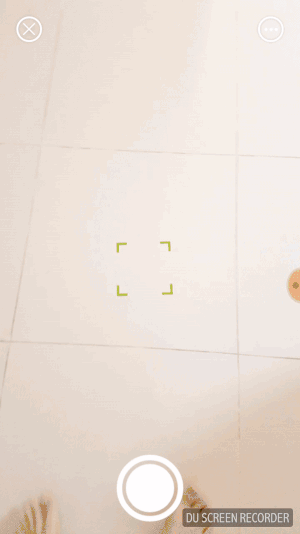
Here are examples of the app:
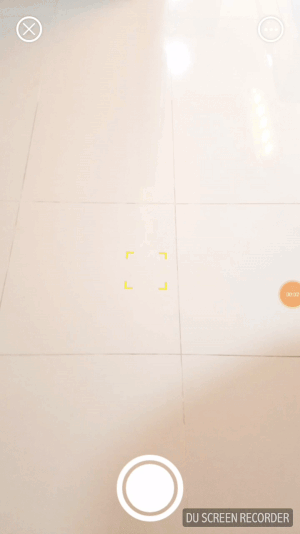
Be surrounded by your favorite animals!
Travel Hack 101
Pre-requisites:
- ARCore only supports the following devices:
- Asus Zenfone AR
- LG V30 (Requires Android 8.0 or higher)
- LG V30+ (Requires Android 8.0 or higher )
- Google Pixel 2
- Google Pixel 2 XL
- Google Pixel
- Google Pixel XL
- OnePlus 5ONEPLUS A5000
- Samsung Galaxy Note8
- Samsung Galaxy S8+
- Samsung Galaxy S8
- Samsung Galaxy S7
- Samsung Galaxy S7 Edge
- Virocore is like SceneKit but for Android developers. Free to use, ViroCore enables developers to rapidly build immersive AR and VR applications. Download Virocore code samples for a start.
Setup
If you have not installed ARCore on your android phone, you may do so by downloading the ARCore SDK for Android. Ensure that you have enabled developer options and debugging on your android phone, otherwise you may do so here.
In Android Studio, open the HelloAR sample project in
Android Studio will build the HelloAR project into a debuggable APK, installs the APK, and then runs the app on your device. ARCore will automatically be installed on your device.
In order to use Virocore, you have to register for an API Key. For this tutorial, we will be using my ARApp as an example and build on top of it. Once you received your API Key, launch AndroidStudio and open ARRetail project. Under App > Manifest > AndroidManifest.xml, replace “API_KEY_HERE” with your API Key. Now, we are ready to begin!
Creating Your Own AR Portal
In this tutorial, we will be focusing on the relevant functions to allow us to create an Animal 3D Object and a Portal (in ProductARActivity.java).
When the app is launched, init3DModelProduct function will be called to create the Portal. The Portal’s appearance, where the Portal leads to and many other customisable features relating to the Portal can be found in this function.
First, we initalise a Node called mProductModelGroup. We create Spotlight for our Portal so that it does not appear dark on our screen. We reference the Spotlight to the mProductModelGroup with the addLight function.
private void init3DModelProduct(ARScene scene){
    // Create our group node containing the light, shadow plane, and 3D models
    mProductModelGroup = new Node();

    // Create a light to be shined on the model.
    Spotlight spotLight = new Spotlight();
    spotLight.setInfluenceBitMask(1);
    spotLight.setPosition(new Vector(0,5,0));
    spotLight.setCastsShadow(true);
    spotLight.setAttenuationEndDistance(7);
    spotLight.setAttenuationStartDistance(4);
    spotLight.setDirection(new Vector(0,-1,0));
    spotLight.setIntensity(6000);
    spotLight.setShadowOpacity(0.35f);
    mProductModelGroup.addLight(spotLight);
Next, we create a shadow for our Portal so it appears more realistic. We will then add the shadow as a child node to the mProductModelGroup using addChildNode function.
// Create a mock shadow plane in AR
Node shadowNode = new Node();
Surface shadowSurface = new Surface(20,20);
Material material = new Material();
material.setShadowMode(Material.ShadowMode.TRANSPARENT);
material.setLightingModel(Material.LightingModel.LAMBERT);
shadowSurface.setMaterials(Arrays.asList(material));
shadowNode.setGeometry(shadowSurface);
shadowNode.setLightReceivingBitMask(1);
shadowNode.setPosition(new Vector(0,-0.01,0));
shadowNode.setRotation(new Vector(-1.5708,0,0));
mProductModelGroup.addChildNode(shadowNode);
Now, we create our Portal model by creating a Object3D object. We load the type of Portal model we want to use using loadModel function. The Portal model should be stored in the asset folder. You can choose another Portal model from here or use your own, as long as it is in the .vrx format.
**Note: **In order to convert into .vrx format, you have to use this script provided by Virocore. It is only available in MacOS.
// Load the model from the given mSelected Product
final Object3D portalModel = new Object3D();
portalModel.loadModel(Uri.parse("file:///android_asset/portal_ship.vrx"), Object3D.Type.FBX, new AsyncObject3DListener() {
    @Override
    public void onObject3DLoaded(Object3D object3D, Object3D.Type type) {
        object3D.setLightReceivingBitMask(1);
        mProductModelGroup.setOpacity(0);
        mProductModelGroup.setScale(new Vector(0.9, 0.9, 0.9));
        mLastProductRotation = object3D.getRotationEulerRealtime();
    }

    @Override
    public void onObject3DFailed(String error) {
        Log.e("Viro"," Model load failed : " + error);
    }
});
We then create a Portal object and add it as a child node to the portalModel. Here comes the fun part, the Portal Scene. This is what makes your Portal a portal. I have added sound effects to make the experience a more immersive one, feel free to change “jungle.mp3” to your own. The image inside the Portal is defined by the Bitmap object. You can change the “jungle.jpg” to any 360 images or videos of your preference. Set the image as the background of the Portal by using the setBackgroundTexture function.
Note: The -2 in portalScene.setPosition(new Vector(0, 0, -2)) means that the Portal will be created 2 metres away from you.
Portal portal = new Portal();
portal.addChildNode(portalModel);
portal.setScale(new Vector(0.5, 0.5, 0.5));

// Create a PortalScene that uses the Portal as an entrance.
PortalScene portalScene = new PortalScene();
portalScene.setPosition(new Vector(0, 0, -2));
portalScene.setPassable(true);
portalScene.setPortalEntrance(portal);
portalScene.setEntryListener(new PortalScene.EntryListener() {
    Sound bird = new Sound(mViroView.getViroContext(), Uri.parse("file///android_asset/jungle.mp3"), null);

    @Override
    public void onPortalEnter(PortalScene portalScene) {
        bird.setLoop(false);
        bird.play();
    }

    @Override
    public void onPortalExit(PortalScene portalScene) {
        bird.pause();

    }
});


// Add a 'jungle' background for the Portal scene
final Bitmap background = bitmapFromAsset("jungle.jpg");
final Texture beachTexture = new Texture(background, Texture.Format.RGBA8, true, false);
portalScene.setBackgroundTexture(beachTexture);
Finally, set the whole group (shadow, light, portal, etc) we created to be invisible when the app launches. We will only reveal the Portal when we touch the cross hair on the screen to give a magical effect, as seen in the examples.
mProductModelGroup.setOpacity(0);
mProductModelGroup.addChildNode(portalScene);
scene.getRootNode().addChildNode(mProductModelGroup);
Whenever you tap on the crosshair on the screen, your very own Portal will now appear! This is made possible by adding a update3DModelProduct() function in the onClick function of the crosshair as shown below:
mCrosshairModel.setClickListener(new ClickListener() {
    @Override
    public void onClick(int i, Node node, Vector vector) {
        setTrackingStatus(TRACK_STATUS.SELECTED_SURFACE);
        update3DModelProduct();
    }

    @Override
    public void onClickState(int i, Node node, ClickState clickState, Vector vector) {
        // No-op
    }
});
update3dModelProduct function makes the Portal visible by using setOpacity(1).
private void update3DModelProduct(){
        Vector position = mCrosshairModel.getPositionRealtime();
        Vector rotation = mCrosshairModel.getRotationEulerRealtime();

        mProductModelGroup.setOpacity(1);
        mProductModelGroup.setPosition(position);
        mProductModelGroup.setRotation(rotation);
}
If you are interested on the details, take a look at the full code here or Virocore References.
Creating Your Own 3D Animal Object
By understanding the structure and how we create our Portal object previously, creating your own 3D Animal Object can be very easy.
Before we begin, you should have a 3D model file available in the assets folder. You can use the Dog 3D model I provided, create your own or find free sources online. For each 3D model, you should at least have these 3 files:
- OBJ file
- MTL file
- Texture files
You may also use FBX file by converting it into .VRX format using this script (MacOS only). Make sure that the files are stored in the assets folder.
We will be creating our own function, createObject, to simplify the process of creating the 3D model. While it may not be compulsory, we add the Spotlight and Shadow to the object. You can experiment with them to see what works best. If you are using your own 3D model, do remember to change “dog.obj” to your OBJ file and the texture file “Diffuse.png” to your model texture file. The .mtl file will not be referenced in the code but it is compulsory to have it in your assets file. In simple words, the .obj file tells the code to look at .mtl file and .mtl file tells the code to look at the respective texture files.
private void createObject(Vector position) {
    Node animalObject = new Node();
    // Create a light to be shined on the model.
    Spotlight spotLight = new Spotlight();
    spotLight.setInfluenceBitMask(1);
    spotLight.setPosition(new Vector(0,5,0));
    spotLight.setCastsShadow(true);
    spotLight.setAttenuationEndDistance(7);
    spotLight.setAttenuationStartDistance(4);
    spotLight.setDirection(new Vector(0,-1,0));
    spotLight.setIntensity(6000);
    spotLight.setShadowOpacity(0.35f);
    animalObject.addLight(spotLight);

    // Create a mock shadow plane in AR
    Node shadowNode = new Node();
    Surface shadowSurface = new Surface(10,10);
    Material material = new Material();
    material.setShadowMode(Material.ShadowMode.TRANSPARENT);
    material.setLightingModel(Material.LightingModel.LAMBERT);
    shadowSurface.setMaterials(Arrays.asList(material));
    shadowNode.setGeometry(shadowSurface);
    shadowNode.setLightReceivingBitMask(1);
    shadowNode.setPosition(new Vector(0,-0.01,0));
    shadowNode.setRotation(new Vector(-1.5708,0,0));
    animalObject.addChildNode(shadowNode);

    final Object3D object = new Object3D();
    object.setPosition(position);
    mScene.getRootNode().addChildNode(object);
    final Bitmap texture = bitmapFromAsset("Diffuse.png");
    object.loadModel(Uri.parse("file:///android_asset/dog.obj"), Object3D.Type.OBJ, new AsyncObject3DListener() {
        @Override
        public void onObject3DLoaded(Object3D object3D, Object3D.Type type) {
            Texture objectTexture = new Texture(texture, Texture.Format.RGBA8, false, false);
            Material material = new Material();
            material.setDiffuseTexture(objectTexture);
            material.setLightingModel(Material.LightingModel.PHYSICALLY_BASED);
            object.getGeometry().setMaterials(Arrays.asList(material));

        }

        @Override
        public void onObject3DFailed(String s) {
        }
    });
    object.setScale(new Vector(0.75,0.75,0.75));
    animalObject.addChildNode(object);
    mScene.getRootNode().addChildNode(animalObject);
}
Now, let’s bind this createObject function to a button!
ImageView productDetails = (ImageView) findViewById(R.id.ar_details_page);
productDetails.setOnClickListener(new View.OnClickListener() {
    @Override
    public void onClick(View v) {
        createObject(mCrosshairModel.getPositionRealtime());
    }
});
The position of the object will be determined by the position of the crosshair. This allows us to look around using the camera and mass produce cute animals at our fingertips.
Congratulations! You made your first Android AR App!
Conclusion
Now that you have a taste of what you can do in an hour, I encourage you to spend a slightly longer amount of time to understand the code and the concept of AR. Try changing some parts of the code, see what works and what doesn’t. You will be surprised at how simple AR can be to pick up!
Here are some things you can explore:
- Add an animated 3D object and play its animation. You can download some animated assets from Virocore here and refer to their documentation here.
- Creating 3D objects inside the portal itself! Similarly, just add the 3D object you created as a child node to the PortalScene.